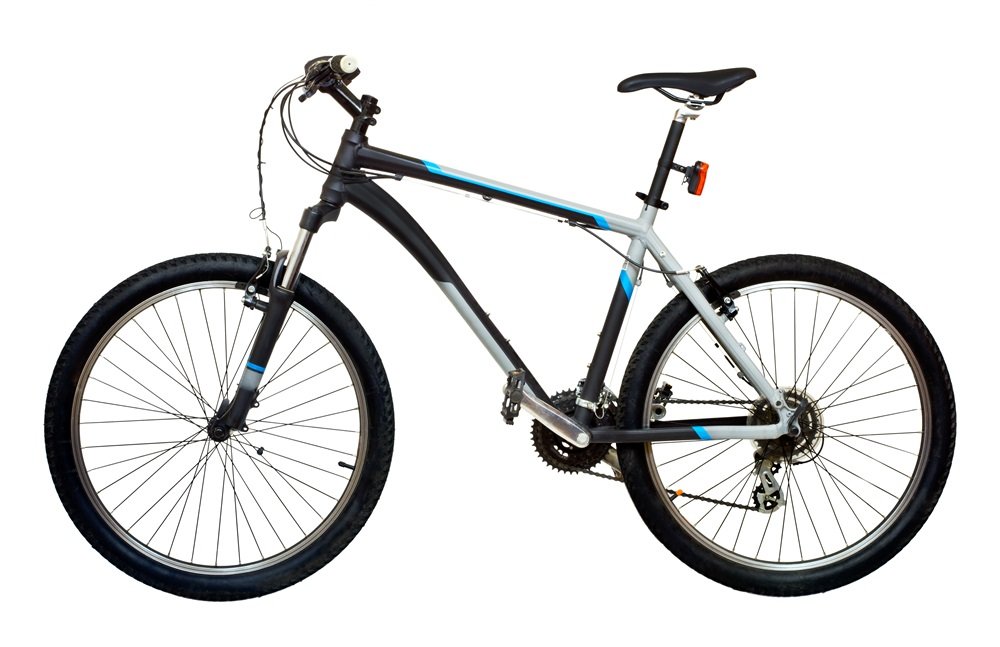
How to Assess the Condition of a Used Mountain Bike Frame?
If you find a good deal on mountain bike frames for sale but aren’t sure about their condition, a proper inspection is essential.
Assessing wear and tear allows you to gauge safety, value repairs, and negotiate price. We’ll explore how to methodically check critical points prone to stress.
With some basic mechanical knowledge and these tips, you’ll leave prepared to discover frames ready for trails.
Methodically Evaluate These Key Areas
Conducting organized sweeps from front to back reveals developing issues. Note cosmetic defects and dig deeper where you spot structural damage.
- Head tube and down tube
- Top tube
- Seat tube
- Rear triangle and suspension pivots
- Dropout and hanger alignment
- Bottom bracket shell
- Integrated frame guards
Head Tube and Down Tube
This junction withstands forceful steering and braking loads. Scan for:
- Paint cracks – Can indicate material fatigue
- Dents or buckling – Signs of impact damage
- Corrosion spots – React quickly to prevent spreading
Apply pressure to check for movement suggesting fracture. Use a coin to tap tubes listening for worrisome dull tones.
Top and Seat Tubes
Scrutinize these areas for:
- Abrasions – Susceptible to cable rub
- Scuffing – Indicates a crash or drop
- Alignment – Misshapen tubes are unstable
Verify straightness using a sprit level or your Observant eye.
Rear Triangle and Suspension Pivots
This complex section withstands rugged terrain. Search for:
- Play – Grab pivots checking for clunking
- Slop – Side-to-side wiggle signals wear
- Cracks – Fatigue strikes high-stress zones
- Bent – Derailleur hanger often impacted
Activate rear suspension shifting weight to expose binding.

Bottom Bracket Shell and Dropout Alignment
- Face bottom bracket applying pressure sideways then downward looking for cracks originating from the shell.
- Study rear dropout spacing. Irregular gaps could make wheels sit askew.
- Verify wheels spin freely when installed. Any rubbing inside the frame demands realignment.
Integrated Frame Protection
Many mountain bikes have guards shielding the underside.
- Chunking – Aggressive riding damages protective skins
- Scuffing – Assess dents underneath
- Cracks – Can penetrate deeper through softer barriers
While cosmetic damage raises fewer concerns, deep impacts often lead to unseen internal trauma. Probe any substantial dings to determine severity.
When to Question Structural Integrity
Certain clues prompt further professional inspection, especially around these locations:
- Head tube and top tube junction
- Suspension pivots and linkages
- Chain and seat stays near dropouts
- Bottom bracket/down tube/seat tube joint
Substantial defects discovered in those high-stress regions may undermine frame cohesion. Don’t ride until carefully examined.
Trust Your Senses
Visual cues provide helpful clues but also tune into these sensations:
- Sounds – Creaking over bumps
- Feel – Frame wiggle or instability
- Intuition – Something makes you uncomfortable
Often our instincts detect subtle changes missed by eyes alone.
You don’t need to be a bike mechanic to assess used mountain bike frames. By breaking the inspection into areas, watching for common issues and tuning into your senses, you can determine if it’s safe to ride.
Test-rides around the block help further evaluate conditions before purchasing frames for sale.


